Nostr integration for CCHS.social (Drupal powered website)
donderdag 21 december 2023 - 474 woorden, 3 min read
In this blog I will explain how I'm using two Drupal contrib modules to integrate some Nostr features. 1) Setup an internet identifier for a Nostr account and 2) publish a text note when you save a piece of content in the CMS.
View this short video I recorded to show what I’m explaining in this blog.
What is cchs.social?
Inspired by Hacker News style websites I started to build a link aggregation website with Instagram profiles about Honda cars and owners. People started to create profiles for their cars and this reflects the period where everyone was creating introduction topics on petrolhead forums before everyone moved to the big social media platforms. The long term goal is to create an online community platform for Honda petrolheads similar to forums in the past. To build a digital place where you can share, learn, discuss and consume the best Honda content from the real world.
Nostr integration
Download and install Nostr internet identifier NIP-05 module:
composer require drupal/nostr_id_nip05
drush en nostr_id_nip05
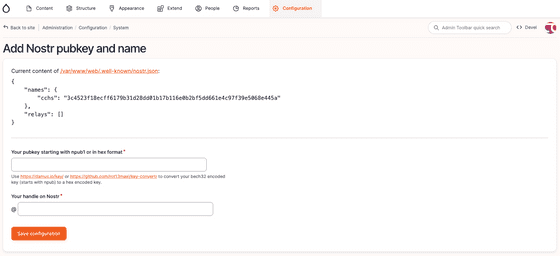
Go to /admin/config/system/nostr-id-nip05 and follow the instructions how to configure your identification.
If you’re stuck on a CORS error, make sure to enforce the following CORS policy on your webserver for the .well-known/nostr.json file. Here is an example how I’ve done this in Nginx:
server {
    server_name cchs.social
    location /.well-known {
        if ($request_method = 'GET') {
            add_header 'Access-Control-Allow-Origin' '*';
        }
    }
}
With an Apache webserver, you can add this snippet to the .htaccess file:
<FilesMatch "^(\.(?!well-known).*">
    Header set Access-Control-Allow-Origin "*"
</FilesMatch>
Download and install the Nostr simple publish module:
composer require drupal/nostr_simple_publish
drush en nostr_simple_publish
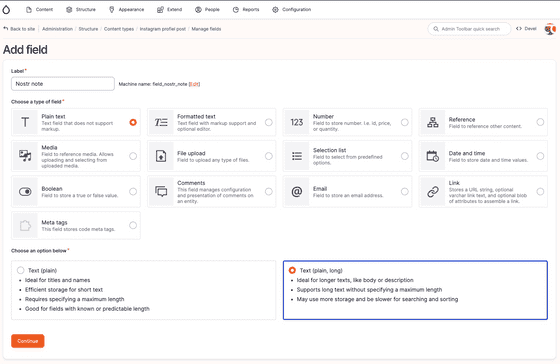
Next step to add a plain text field to a content type:
In my case, the machine name of the field is field_nostr_note.
Let’s configure this field, your Nostr keys and relays within Drupal now. Open your settings.local.php file and add the following lines and modify these with your settings:
// I always store these files in the private directory of Drupal outside the webroot directoty
$settings['nostr_public_key_file'] = './../private/nostr/to-your_public-key-file';
$settings['nostr_private_key_file'] = './../private/nostr/to-your-private-key-file';
// This is my personal relay, my advice is to use a public one instead like wss://relay.damus.io:
$settings['nostr_relay'] = 'wss://nostr.sebastix.dev';
// The machine new of the added field to our content entity:
$settings['nostr_content_fields'] = ['field_nostr_note'];
The public key file contains the npub string of your Nostr account. The private key file contains the nsec string of your Nostr account.
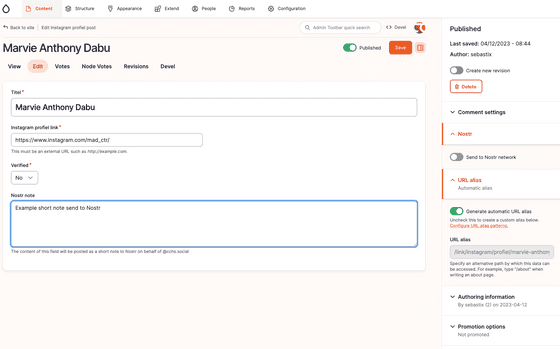
With this configuration, I’m able to publish short text notes on behalf of the @cchs.social Nostr account from the CMS:
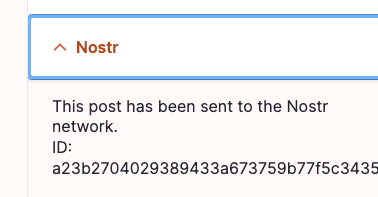
When publishing a note succeeded, you will see the event id under the Nostr tab when you open the edit content page again:
and the note showed up on a client (Coracle in this screenshot):
What’s next?
Build a solid onboarding process where you can register / login with your Nostr account on the website. This use-case is part of the Nostr empowered PHP/Drupal initiative which I’m working out.
Resources


